


Hello, checkiomates🐱👤!
First of all, CheckiO team fixed some minor issues and updated CheckiO Client and now you may confidently use it with Python 3.12 at your local machine!
But in general, this post is dedicated to an easier way to create a new mission at CheckiO. It comes into reality thanks to such functionality at GitHub as template repositories. Let's move over the needed steps. (Click an image to enlarge it in a new tab)
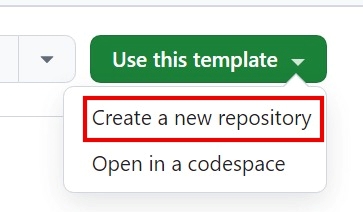
1. Go to CheckiO mission template repository at GitHub. Notice Use this template button to the right.

2. Press the button, than press Create a new repository button.
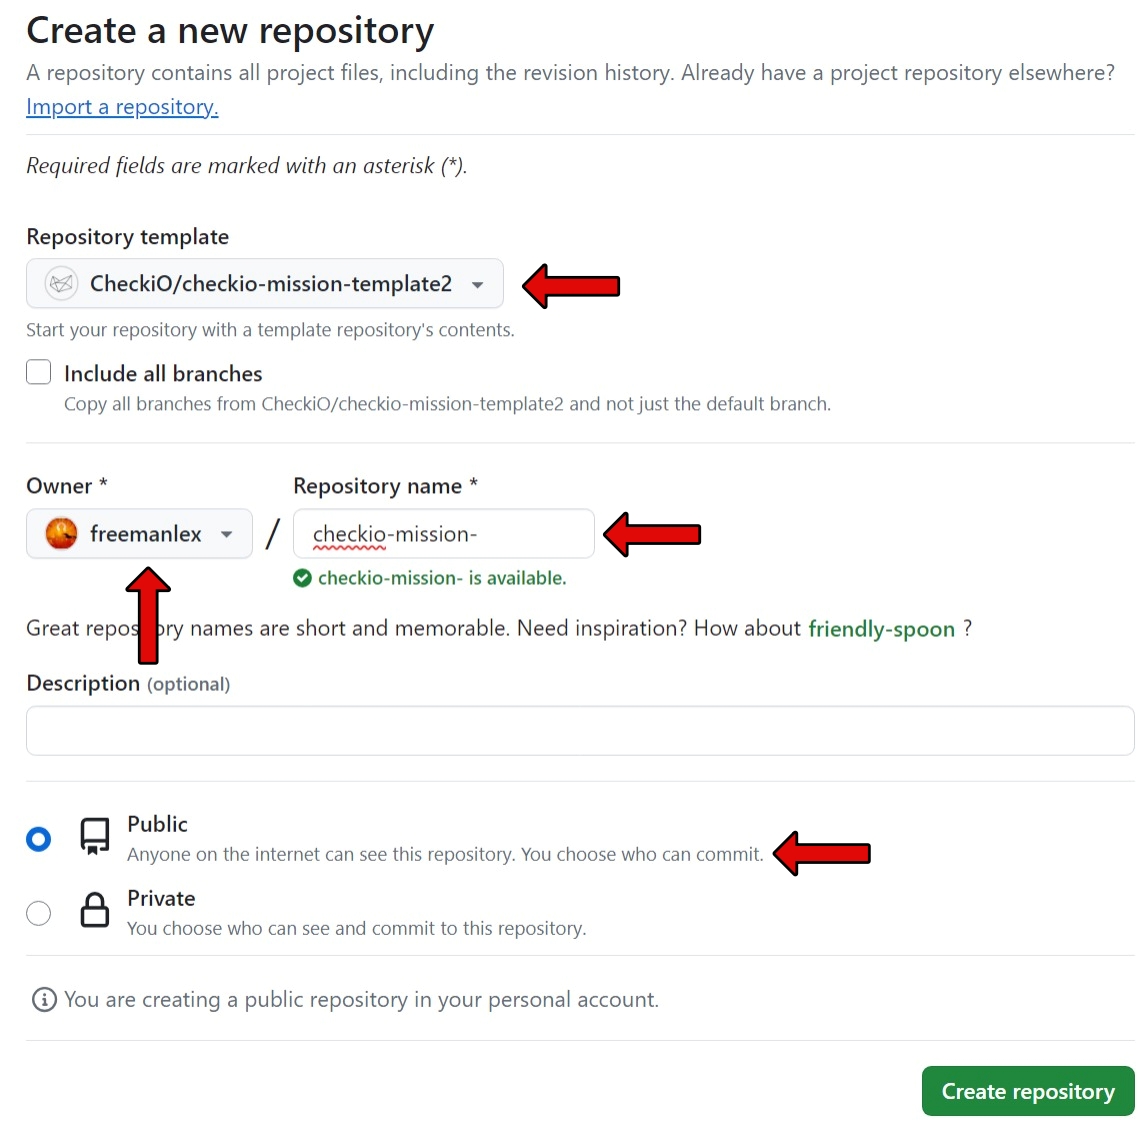
3. At the next screen notice the chosen template, your account (not mine) as Owner, choose a repository name (usually, it's like mission title and must start with checkio-mission-), also notice repository to be public. If everything is fine, press Create repository.
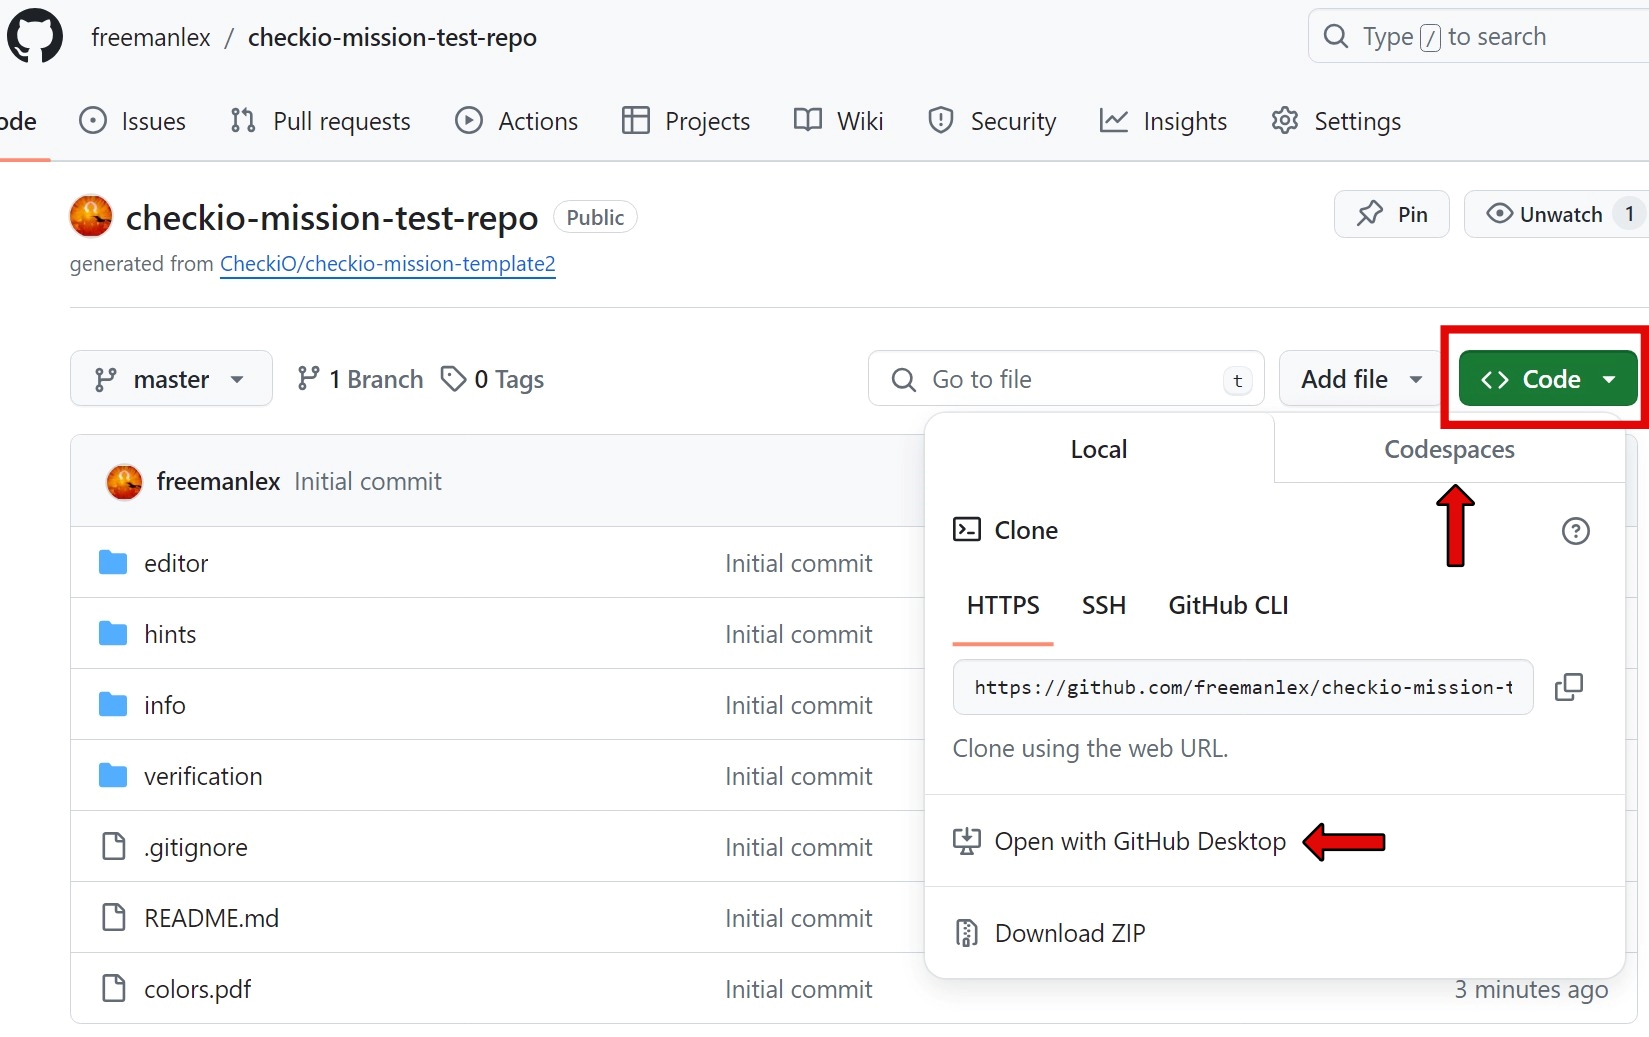
4. At the next screen you see the repository. Now you need to edit it to become your mission. You may do editing in different ways: directly thru GitHub explorer (not recommended), creating respective online codespace or at your local machine after copying via GitHub Desktop or terminal commands.
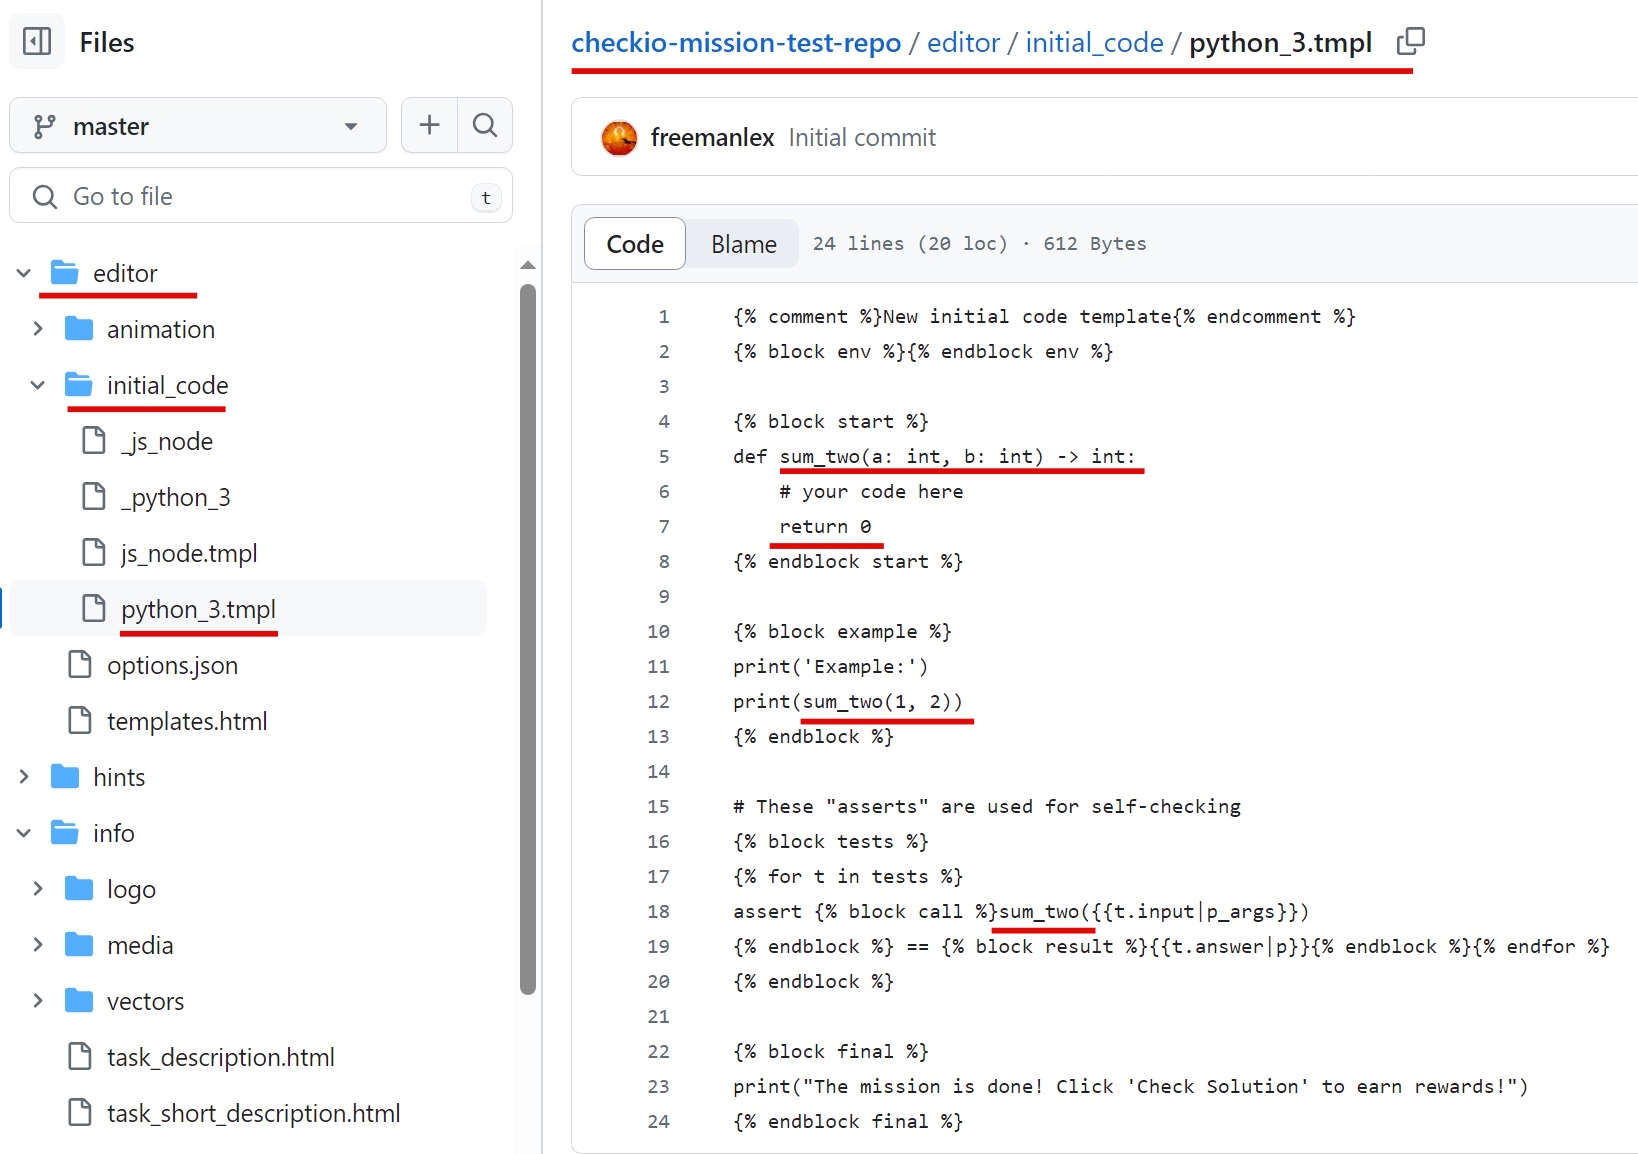
5. The minimum needed number of efforts to create a new simple mission is to change 5 files. (GitHub explorer is used to show)
5.1. The first one is /editor/initial_code/python_3.tmpl. It's necessary to define here: function name, argument(s) name(s) and type, output type, output default value (usually zero or its equivalents of other data types), default example.
5.2-5.3. The second and third are /info/task_description.html and /info/task_short_description.html. It's necessary to describe a mission deeply enough, input and output values here. If you use image, add it to media forder, otherwise hide/delete this paragraph.
You may hide/delete the following paragraphs if you have no useful info to write there.
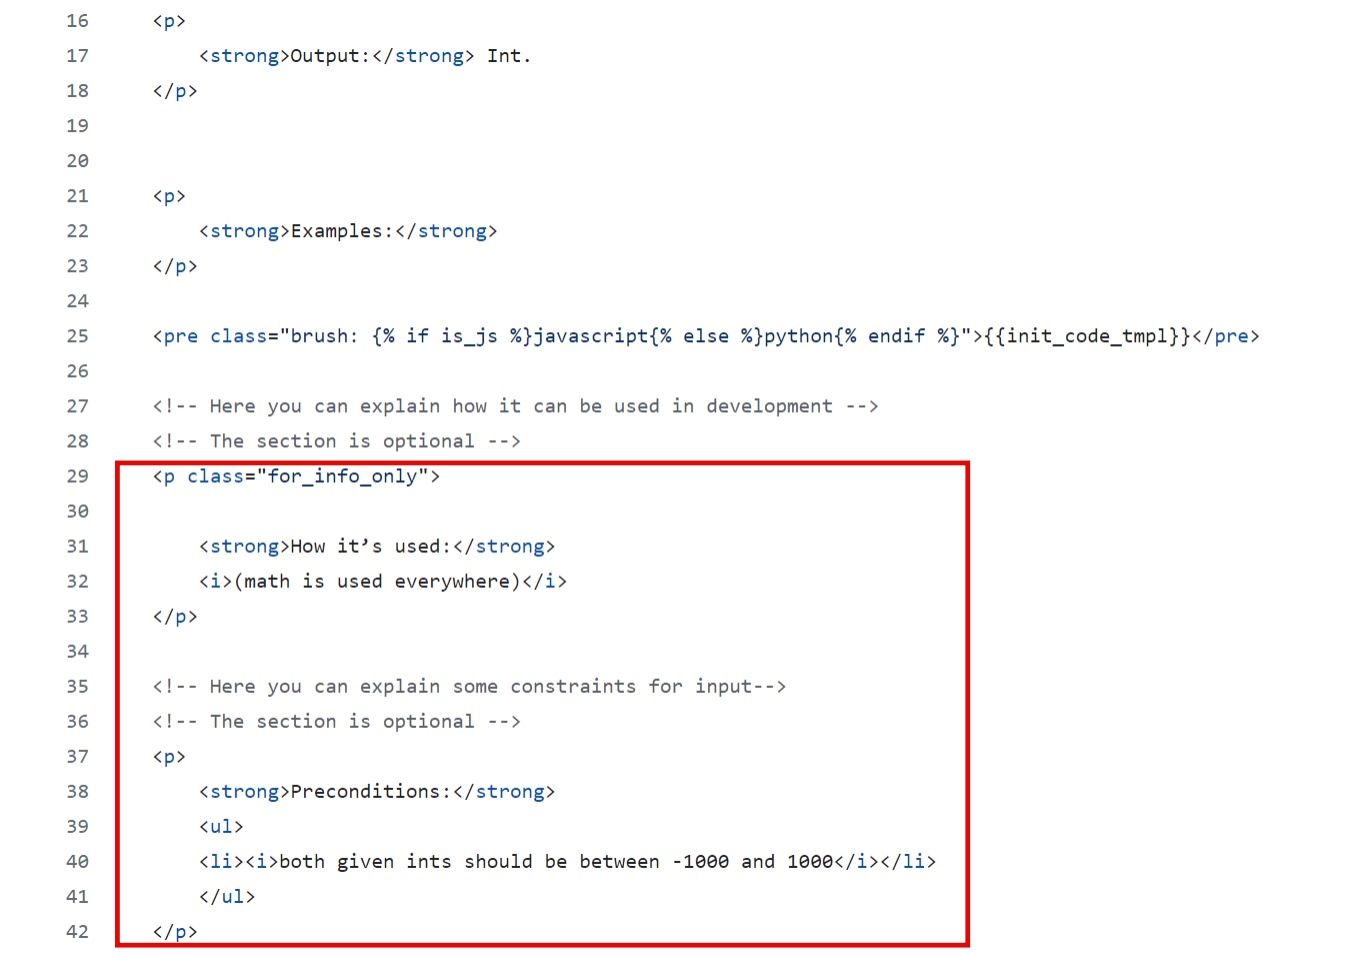
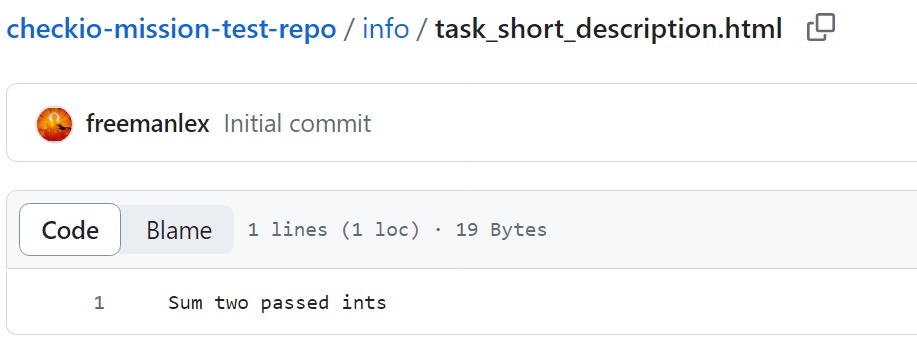
Write a very short catching description for your mission at /info/task_short_description.html.
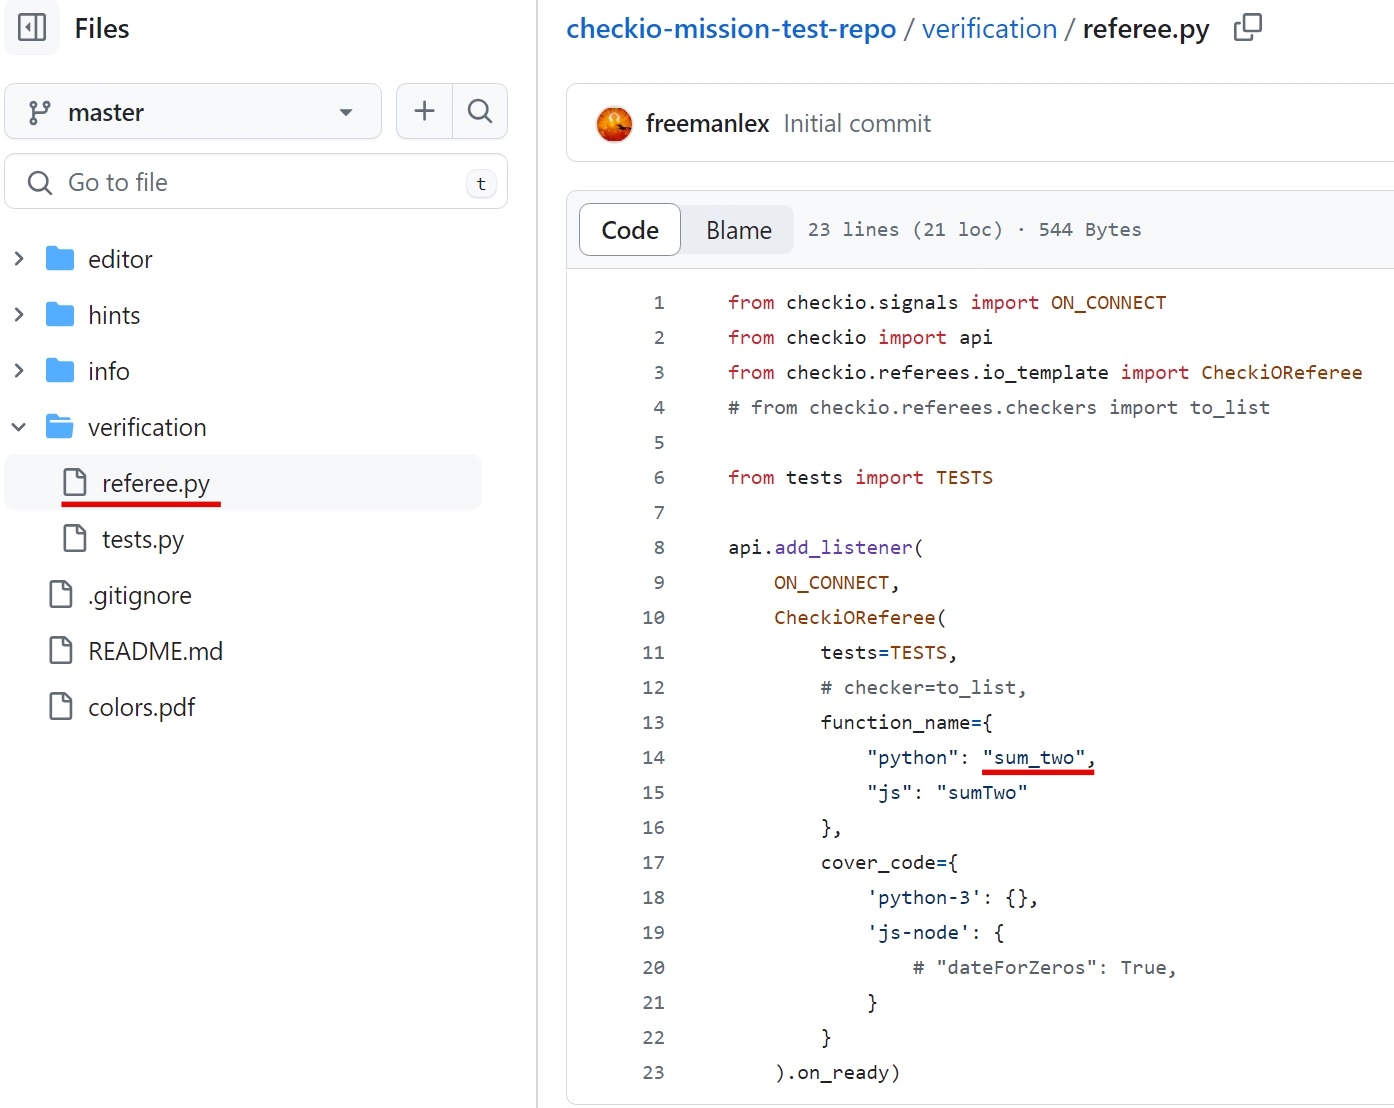
5.4. The fourth is /verification/referee.py. Usually, you only need to correct you function name there instead of the default one.
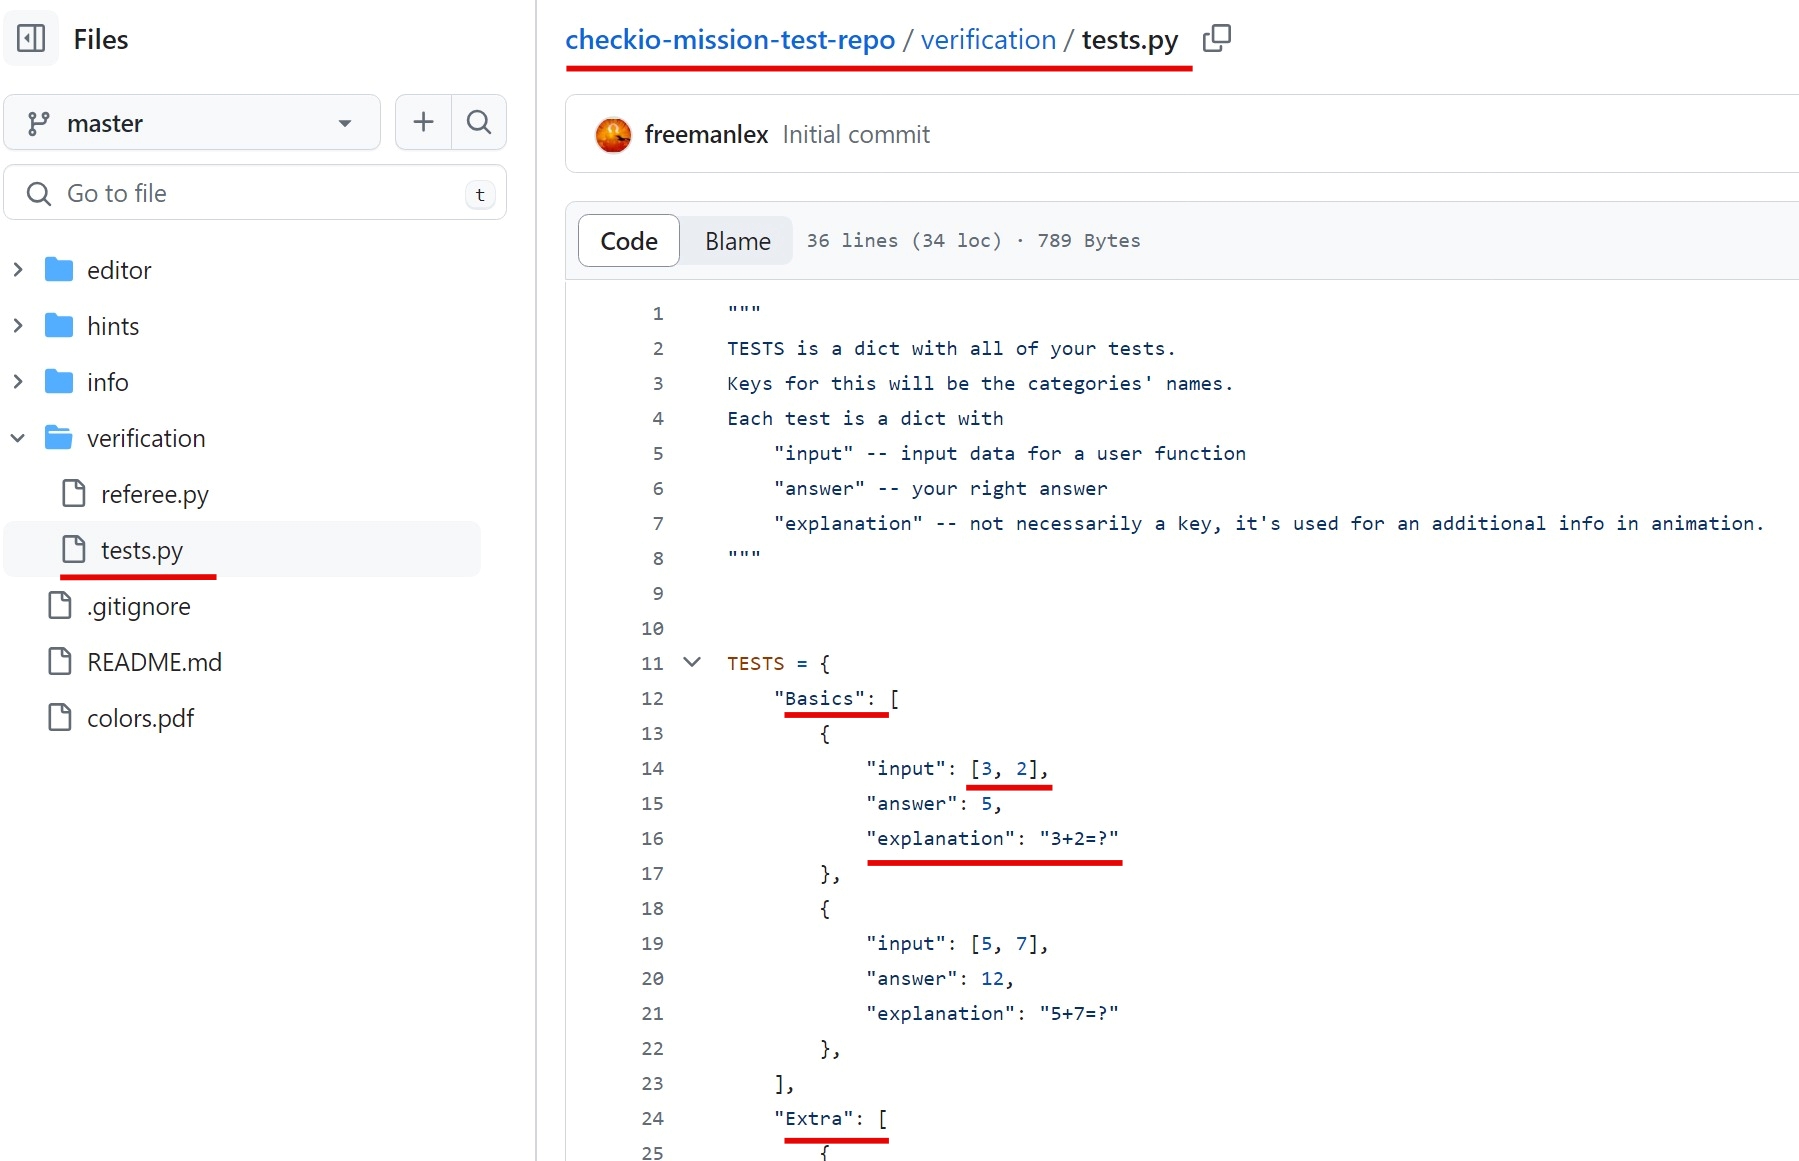
5.5. The fifth is /verification/tests.py. Fill in Basic and Extra blocks with test cases. Notice, that input must be a list of arguments. Hide or remove explanations if you don't need them.
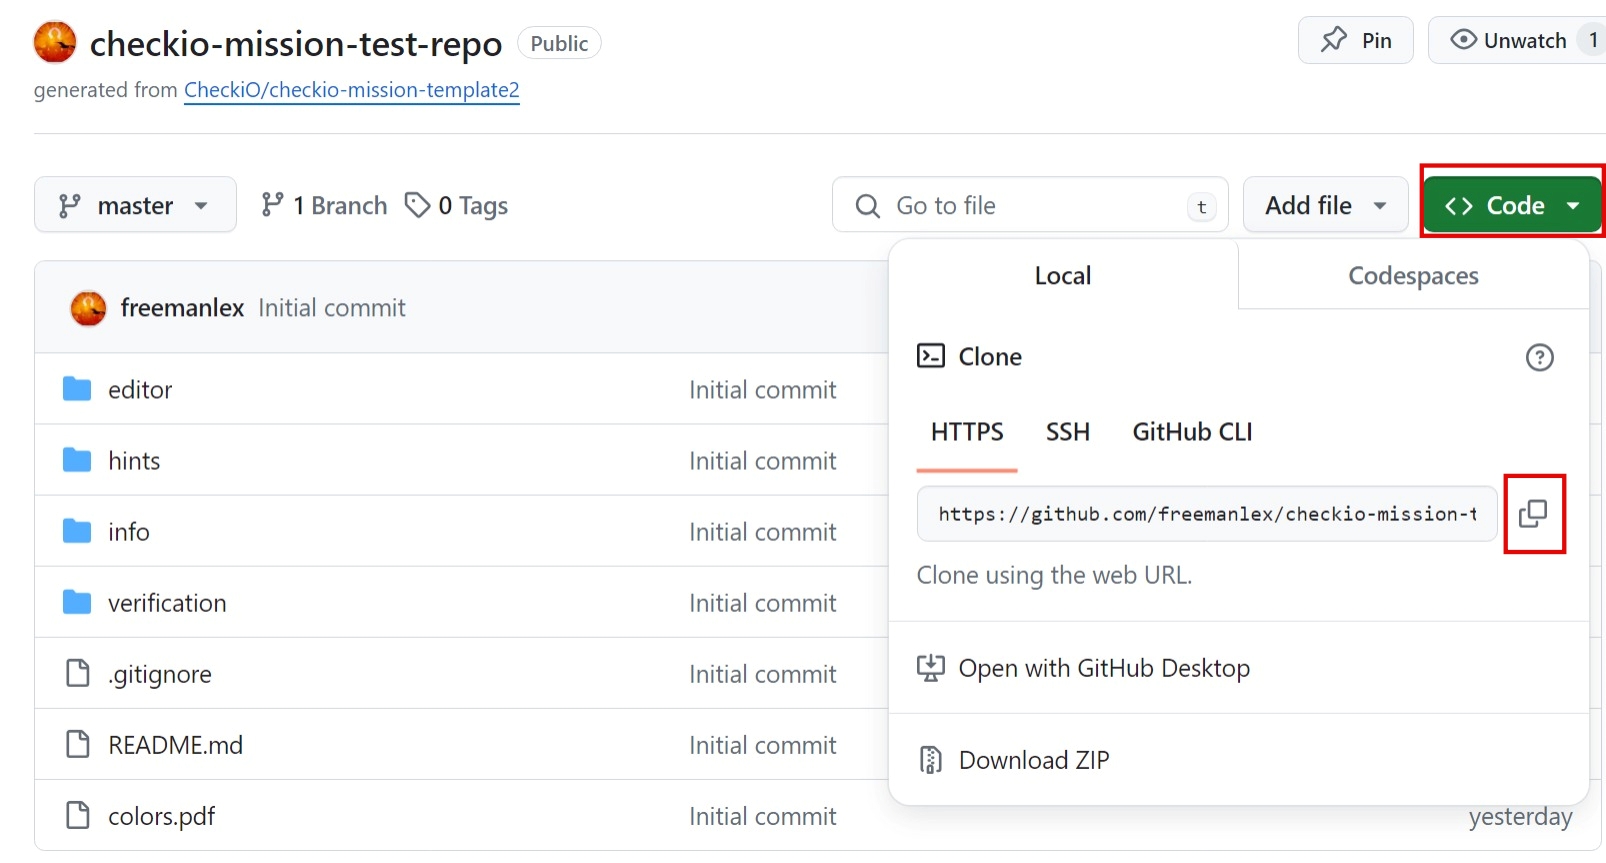
6. That is actually all! Your repository is minimally filled and the mission is ready to be placed at CheckiO! Go to the top level of repository, press Code and copy a url.
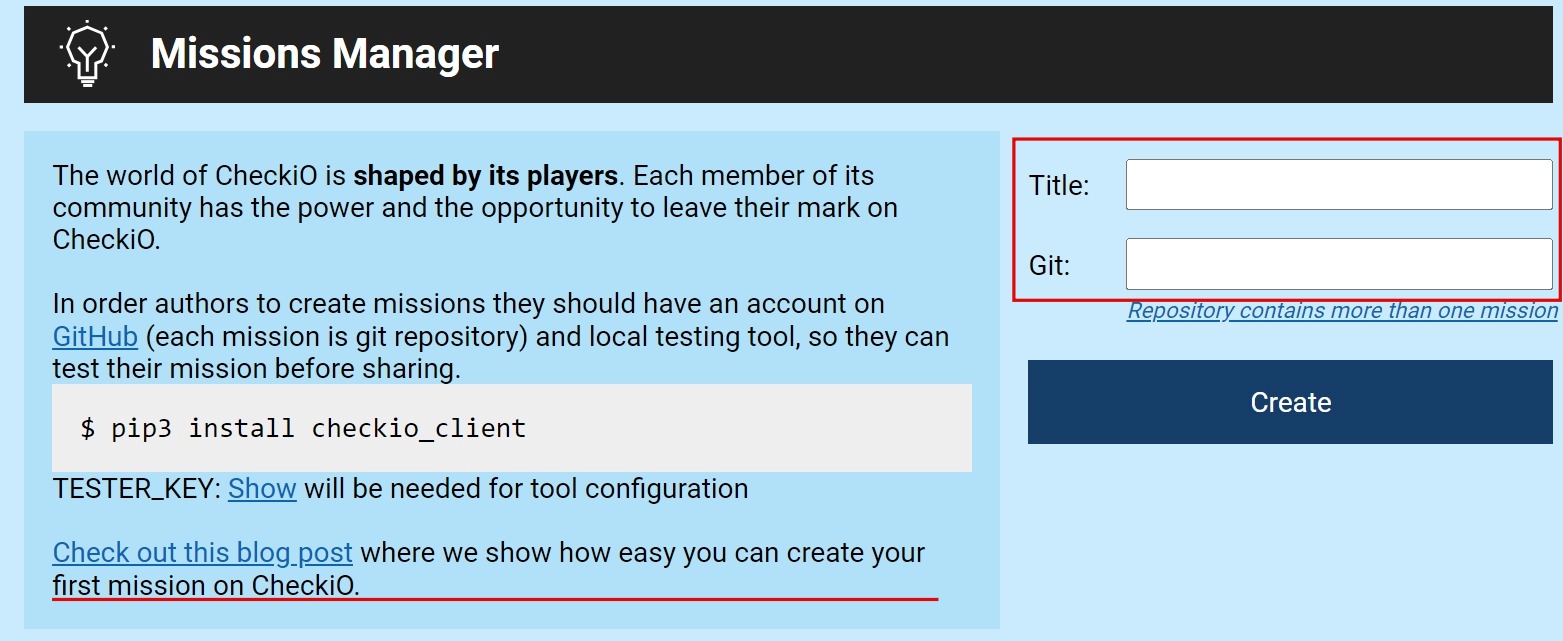
7. Go to side menu at CheckiO, click on you nickname, then click on Mission Manager. Type a title of your mission and paste its url at the fields and click Create. There is also a link to another post about creating a mission using terminal.
8. After these steps you may see your mission at Mission Manager. Click Create Forum post and Add to polygon station to make your mission visible to others and discussed.

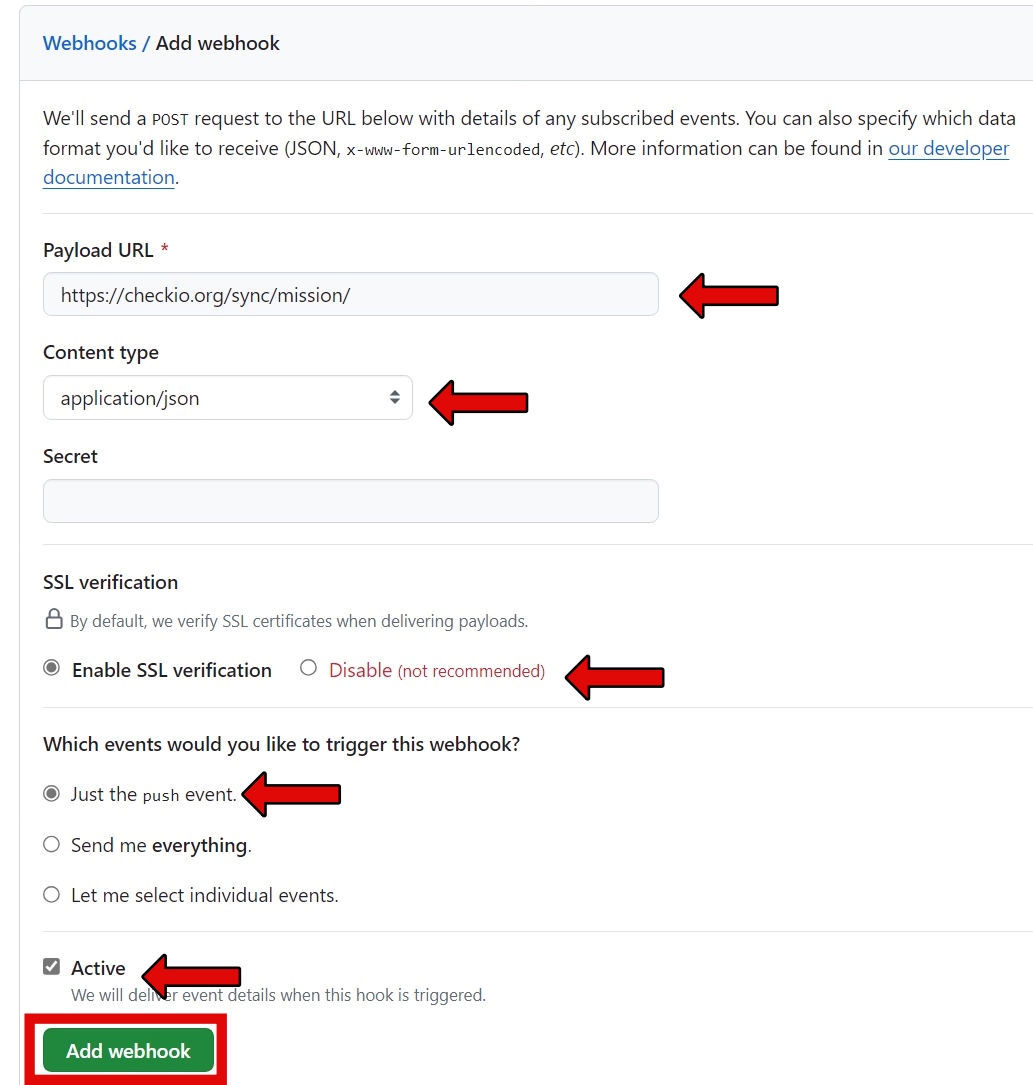
9. In order for changes to the repository to be automatically posted to the site and you don't have to go and click the Sync every time, you need to add a webhook for the repository you created for the mission. At your mission repository go to Settings - Webhooks and press Add webhook.

Check the following parameters, Payload URL is always the same https://checkio.org/sync/mission/, as shown:
That's all, but if you want to test the mission locally, we have a console client that can help you with that. Here is an article about it.
🙌 Thanks for your attention! Hope to meet you at CheckiO. We are really interested in your thoughts! Please, leave a comment below! ⤵
